
RNS Venture

Blog

Your blog category

Blog

Why BIS ER Certification (STQC) is Important for CCTV Cameras in India

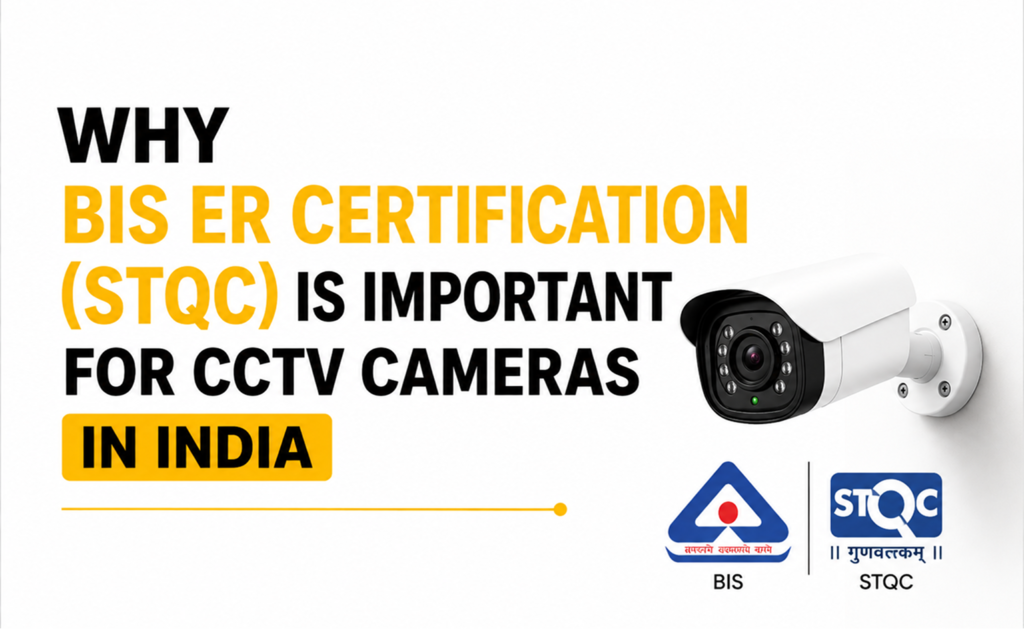
Why BIS ER Certification (STQC) is Important for CCTV Cameras in India Introduction Over the past decade, the role of Closed-Circuit Television (CCTV) cameras in India has transformed dramatically. What was once viewed merely as a passive monitoring tool for catching shoplifters or deterring trespassers is now a critical pillar of enterprise security, smart city infrastructure, and national defense. As CCTV systems evolved from closed analog loops to internet-connected digital networks, they brought unprecedented convenience—but they also opened the door to severe cybersecurity vulnerabilities. An unsecured network camera can easily become a gateway for hackers to infiltrate corporate networks, spy on sensitive operations, or launch massive botnet attacks. Recognizing these vulnerabilities, the Government of India, through the Ministry of Electronics and Information Technology (MeitY), stepped in to regulate the surveillance landscape. MeitY introduced the “Essential Requirements (ER) for Security of CCTV Cameras,” bringing them under the Bureau of Indian Standards (BIS) Compulsory Registration Order (CRO). To validate that a camera meets these stringent security standards, it must undergo rigorous testing by the Standardisation Testing and Quality Certification (STQC) Directorate. The mandate is clear: CCTV cameras are no longer just feature-driven hardware; they are regulated network devices. With strict deadlines approaching to phase out non-compliant stock, the transition to certified surveillance is non-negotiable. Whether you are a business owner, a system integrator, or an IT head, understanding this regulatory shift is crucial. Here is a deep dive into why BIS ER Certification and STQC testing are absolutely vital for CCTV cameras in India today.   8 Reasons Why BIS ER Certification and STQC are Critical   1. Robust Protection Against Cyber Threats and Hacking The most immediate benefit of BIS ER and STQC certification is the fortification of cameras against cyberattacks. Uncertified, cheap imports are notorious for shipping with easily exploitable vulnerabilities, hardcoded default passwords, and hidden backdoors. Hackers routinely scan the internet for such weak devices to hijack them for malicious purposes. Under the Essential Requirements (ER), a certified CCTV camera must have secure default settings, meaning users are forced to create a strong, unique password upon initial setup rather than relying on a shared default. Furthermore, STQC testing actively looks for hidden access points and vulnerabilities in the firmware. By mandating these baseline security measures, certification ensures that your surveillance system acts as a protective shield rather than the weakest link in your IT infrastructure. 2. Ensuring Legal Compliance and Avoiding Penalties The regulatory landscape in India is shifting from voluntary compliance to mandatory enforcement. CCTV cameras are now formally covered under the BIS Compulsory Registration Scheme (IS 13252) alongside the new cybersecurity ERs. The government has set firm deadlines after which the sale, distribution, and installation of non-compliant cameras will be strictly prohibited across the country. For businesses and installers, ignoring these mandates carries significant legal and financial risks. Procuring or deploying uncertified hardware can lead to hefty penalties, the confiscation of equipment, and the forced ripping-out of installed systems. Ensuring that every camera you purchase carries a valid BIS Registration Certificate (RC) number and STQC approval is the only way to safeguard your investments and stay on the right side of the law. 3. Safeguarding Sensitive Data and Video Privacy Surveillance cameras constantly capture highly sensitive data, ranging from employee movements and manufacturing processes to customer behaviors and secure facility layouts. If this video feed is intercepted during transmission, the privacy breaches can be catastrophic for an organization’s reputation and operations. BIS ER certification tackles this by mandating strong data protection mechanisms. Certified cameras must utilize encrypted communication protocols (such as TLS or HTTPS) for all data moving between the camera and the Video Management System (VMS) or Network Video Recorder (NVR). This end-to-end encryption ensures that even if a bad actor manages to intercept the network traffic, the video feed remains unreadable and secure. STQC testing validates that these encryption standards are not just promised on paper, but correctly implemented in the device’s software. 4. Hardware Integrity and Tamper Resistance While much of the focus is on software vulnerabilities, physical hardware tampering is an equally dangerous threat. Sophisticated attackers with physical access to a camera can extract firmware, steal encryption keys, or manipulate the device using exposed physical ports on the circuit board. The ER guidelines require CCTV cameras to be resilient at the hardware level. This includes disabling unprotected debug and test ports (like UART or JTAG) that are typically used during manufacturing but are a massive security risk if left open in a finished product. Additionally, STQC standards look for secure boot processes, which verify that the camera only boots up using digitally signed, authentic firmware from the manufacturer. These hardware-level defenses make it incredibly difficult for attackers to compromise the physical unit. 5. Essential for Government and Enterprise Procurement If your business involves supplying equipment to government bodies, Public Sector Undertakings (PSUs), or participating in tenders on the Government e-Marketplace (GeM), certification is no longer optional—it is a strict prerequisite. The government has mandated that only STQC-certified and BIS-ER compliant cameras can be utilized in public infrastructure projects, smart city deployments, and sensitive installations. This trend is rapidly spilling over into the private sector. Large enterprises, multinational corporations, and housing societies are increasingly updating their vendor policies to mirror government standards. Choosing uncertified surveillance brands effectively locks a business out of lucrative contracts and large-scale projects. Adopting certified cameras ensures total market eligibility and prevents project rejections based on compliance failures. 6. Transparency in Supply Chain and National Security Surveillance is inherently tied to national security. Over the years, intelligence agencies globally have raised alarms about foreign-manufactured surveillance equipment secretly routing data to overseas servers. To combat espionage and unauthorized data harvesting, India’s regulations demand complete transparency regarding a product’s origins. The BIS ER framework requires manufacturers to declare their software and hardware Bill of Materials (BoM). This means the origins of the System-on-Chip (SoC), image sensors, and memory units are documented and scrutinized. Furthermore, the certification process ensures that the camera
Blog

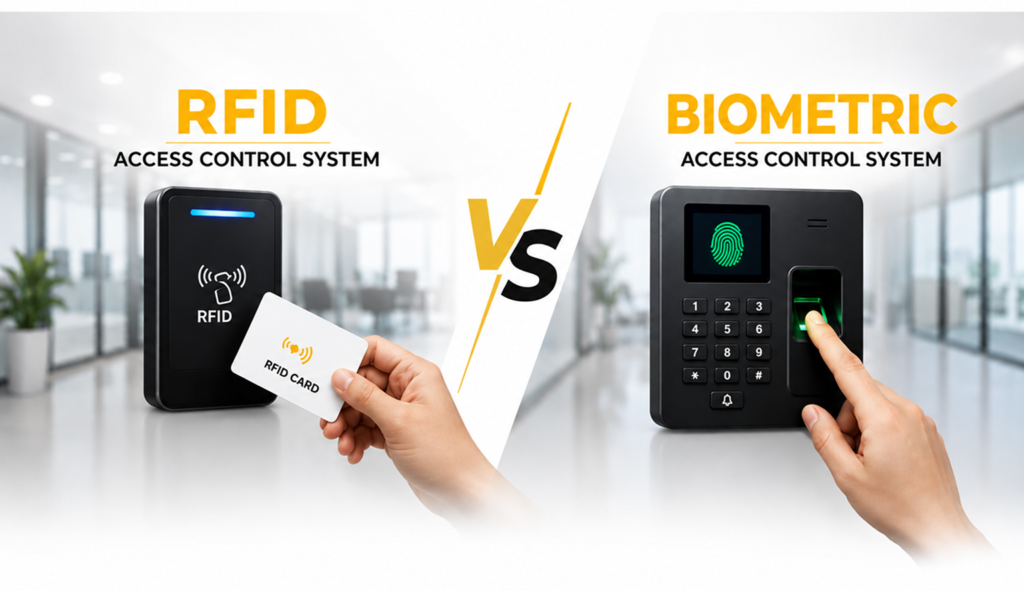
RFID vs Biometric Access Control System, Which Is Better? Compare Features, Pros & Cons

RFID vs Biometric Access Control System, Which Is Better? Compare Features, Pros & Cons The Great Security Showdown: RFID vs. Biometric Access Control System Introduction Securing a modern facility is no longer just about heavy doors and physical keys. As businesses scale, threats evolve, and the need for seamless operational efficiency grows, organizations face a critical decision: how to effectively manage who enters which zone, and when. Two dominant technologies have emerged at the forefront of this security evolution: Radio Frequency Identification (RFID) and Biometric Access Control Systems. While both systems serve the same ultimate purpose—restricting unauthorized access and protecting valuable assets—they operate on fundamentally different philosophies. RFID relies on what you have (a physical token, card, or key fob), whereas biometrics relies on who you are (a unique biological characteristic like a fingerprint, iris, or facial structure). Choosing the right system is not a matter of finding the “absolute best” technology, but rather finding the best alignment for your specific organizational needs, budget, and operational environment. This comprehensive guide breaks down the features, pros, and cons of both systems across eight critical dimensions to help you make an informed decision. 1. Core Technology and Operational Features H4: How RFID Systems Function RFID access control systems utilize electromagnetic fields to identify and track tags attached to objects or carried by individuals. The system consists of three primary components: the RFID tag (embedded in a card, fob, or wristband), the reader, and the backend controller. When a user places their credential near the reader, the reader emits radio waves that activate the passive microchip inside the tag. The tag then transmits its unique identification number back to the reader, which verifies it against the database to grant or deny access. RFID operates across various frequencies, with high-frequency (13.56 MHz) and ultra-high frequency (UHF) systems offering encrypted communication and longer read ranges. H5: How Biometric Systems Function Biometric systems bypass physical tokens entirely by measuring and analyzing distinct human physiological or behavioral characteristics. The most common modalities include fingerprint scanning, facial recognition, iris scanning, and hand geometry. The system works in two distinct phases: enrollment and verification. During enrollment, the system captures a high-resolution scan of the user’s biological feature, extracts unique data points (such as minutiae points on a fingerprint or nodal points on a face), and converts them into a secure, mathematical template. When a user attempts access, the system performs a live scan, converts it into a temporary template, and matches it against the stored data in milliseconds. 2. Security and Vulnerability Levels H4: The Vulnerabilities of Physical Tokens (RFID) While RFID is highly effective for basic access management, its reliance on physical credentials introduces distinct security risks. The most prominent vulnerability is that RFID cards can be lost, stolen, borrowed, or copied. If an employee misplaces their badge, an unauthorized individual can easily gain access to the facility before the card is reported missing and deactivated. Furthermore, legacy low-frequency RFID systems (125 kHz) lack robust encryption, making them susceptible to “skimming” or “cloning” using cheap, readily available hardware bought online. H5: The Unclonable Nature of Identity (Biometrics) Biometrics offers a significantly higher baseline of security because biological traits cannot be easily transferred, forgotten, or shared. Employees cannot loan their fingerprint or retina to a coworker to log a shift early or enter a restricted zone. This completely eliminates “buddy punching” in time-attendance tracking and ensures absolute accountability. Modern biometric readers also incorporate liveness detection (such as pulse sensing or thermal imaging) to prevent spoofing attempts using high-resolution photographs, silicone molds, or synthetic models. 3. User Experience, Convenience, and Speed H4: Frictionless Scanning with RFID From a user perspective, RFID is incredibly intuitive and fast. Tapping a card or holding a key fob near a reader takes less than a second. It requires minimal user cooperation and functions perfectly regardless of environmental conditions or physical changes in the user. Furthermore, long-range UHF RFID systems allow for entirely passive access—meaning employees can pass through a barrier or turnstile with their badge still inside their wallet or pocket, maximizing throughput during peak traffic hours. H5: Environmental Variables in Biometric Throughput Biometric systems offer the convenience of never needing to carry a physical key, removing the hassle of locked-out employees. However, the authentication process can sometimes experience friction based on environmental or physical variables. A fingerprint scanner may struggle to read a finger that is wet, dirty, scarred, or extremely dry. Facial recognition systems can be impacted by drastic lighting changes, heavy eyewear, or protective face masks. These variables can result in False Rejection Rates (FRR), requiring users to retry scanning, which can slow down entry lines during morning rushes. 4. Implementation, Hardware, and Scalability Costs H4: The Budget-Friendly Scalability of RFID RFID systems feature a relatively low upfront hardware cost. Standard RFID readers are affordable and highly durable. However, the long-term operational cost of RFID lies in credential management. Organizations must continuously purchase, program, and distribute physical cards or fobs. As companies hire new staff, or when employees inevitably lose their badges, replacement costs compound over time. Despite this, for large enterprises with thousands of users, the initial deployment budget remains highly accessible. H5: The Upfront Investment of Biometric Deployment Biometric hardware is sophisticated and carries a significantly higher upfront purchase price compared to standard RFID readers. Devices featuring advanced facial recognition cameras, dual-spectrum illumination, or iris scanners represent a major capital expenditure. However, biometrics features an incredibly low long-term operational cost. Because the user’s body is the credential, there are zero ongoing expenses related to buying, replacing, or administrative printing of physical cards. Over a multi-year lifecycle, a biometric system can become highly cost-effective for static workforces. 5. Administrative Overhead and Card Lifecycle Management H4: Managing the Logistics of Physical Assets Operating an RFID system requires ongoing administrative upkeep. Security or HR teams must manage a constant lifecycle of issuance, collection, and deactivation. When an employee leaves the company, failing to retrieve their physical card creates an immediate security

Blog

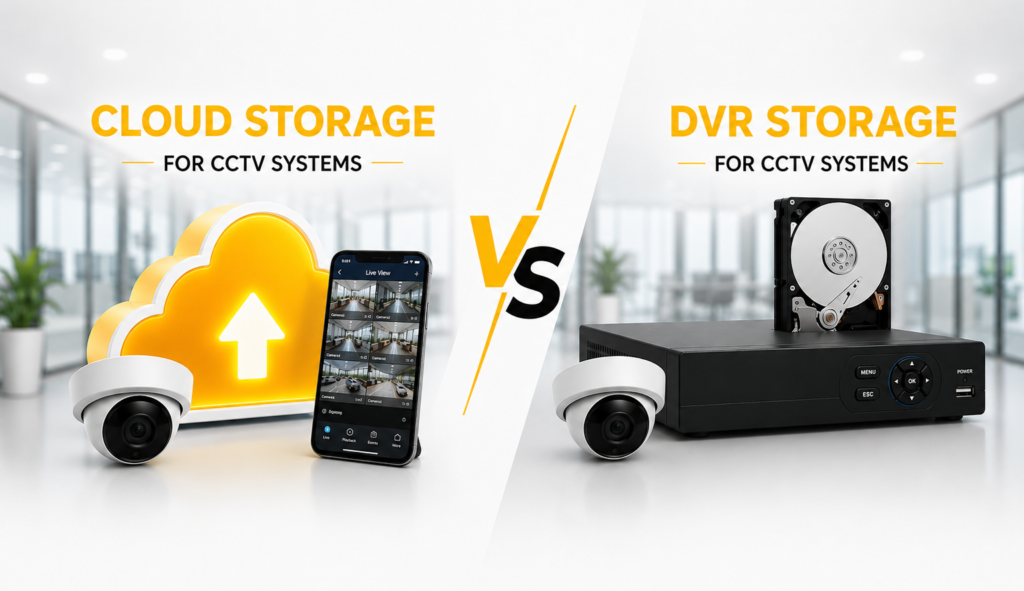
Cloud Storage vs DVR Storage for CCTV Systems

Cloud Storage vs DVR Storage for CCTV Systems Got it! Let’s bring all those comparative costs, hardware options, and installation budgets directly into Indian Rupees (INR) based on the current Indian security market trends. Whether you are looking at top-tier brands widely available in India (like Hikvision, CP Plus, Dahua, or smart Wi-Fi brands like TP-Link Tapo, Mi, and Qubo), here is how the financial landscape shapes up. 1. Hard Costs: Wired vs. Wireless Systems (in INR) If you are planning a typical 4-Camera Setup for a home or small office in India, here is how the direct hardware and installation costs stack up: Cost Component Wired PoE System (e.g., CP Plus / Hikvision) Wireless Wi-Fi System (e.g., TP-Link Tapo / Qubo) Cameras (4 Units) ₹8,000 – ₹16,000 (depending on 2MP vs 5MP) ₹6,000 – ₹12,000 (plug-in smart cameras) Recording Hub ₹6,000 – ₹9,500 (4/8-Channel NVR) N/A (Direct to Cloud or SD card) Storage Media ₹4,500 – ₹6,000 (1TB/2TB Surveillance HDD) ₹2,400 – ₹4,000 (4 x 128GB MicroSD cards) Cabling & Accessories ₹3,000 – ₹5,000 (Cat6 Bundle, RJ45, Conduit) ₹1,000 – ₹2,000 (Power extension cords) Installation Labor ₹3,000 – ₹6,000 (Professional routing) ₹0 – ₹1,500 (Mostly DIY-friendly) Total Initial Outlay ₹24,500 – ₹42,500 ₹9,400 – ₹19,500 2. The Subscription Trap: Cloud vs. Local DVR/NVR (in INR) While wireless cloud cameras look incredibly cheap upfront, their monthly operational costs can quickly add up compared to a one-time local storage investment. Option A: Local NVR Storage (One-Time Cost) Surveillance Hard Drive (1 TB – WD Purple / Seagate SkyHawk): ₹4,500 (One-time investment). Surveillance Hard Drive (2 TB): ₹6,000 (One-time investment). Ongoing Monthly Fee: ₹0 (All recordings are stored on your desk; zero internet upload required). Option B: Cloud Storage Subscription (Recurring Cost) Most smart wireless camera brands in India charge per-camera plans for continuous event recording (typically 7-day or 30-day history cycles): Average Cloud Subscription: ₹150 to ₹300 per camera, per month. For a 4-Camera Setup: Monthly: ₹600 to ₹1,200 per month. Annually: ₹7,200 to ₹14,400 per year (indefinitely). ⚠️ The Internet Bill Factor: Streaming 4 high-definition wireless cameras continuously to the cloud can consume 150 GB to 300 GB of data per month. If you do not have an unlimited broadband plan (like JioFiber or Airtel Xstream starting around ₹499 to ₹799/month), data overage charges will quickly inflate your monthly costs. 3. Popular Hardware Options in India   If you are currently exploring hardware, these are the most common pricing tiers in Indian retail markets: Entry-Level Smart Wi-Fi Cameras (Indoor): ₹1,500 – ₹2,500 (e.g., TP-Link Tapo C200, Mi Home Security Camera 360). Outdoor Weatherproof Wi-Fi Cameras: ₹2,800 – ₹5,000 (e.g., Tapo C310, Kent CamEye, Qubo Outdoor). Standard 2MP/5MP Analog Dome/Bullet Cameras: ₹1,200 – ₹3,000 per camera (requires a DVR). Professional IP PoE Cameras (Dome/Bullet): ₹2,500 – ₹6,000 per camera (requires an NVR). Summary Recommendation for the Indian Market Go with Wired (PoE) if: You own your property, want a robust system with no monthly bills, want to record 24/7 continuously, and want to avoid slowing down your home/office broadband network. Go with Wireless (Wi-Fi) if: You are renting, want a quick 15-minute DIY setup, need only 1 or 2 cameras, and have a reliable, unlimited high-speed fiber internet connection.      

Blog

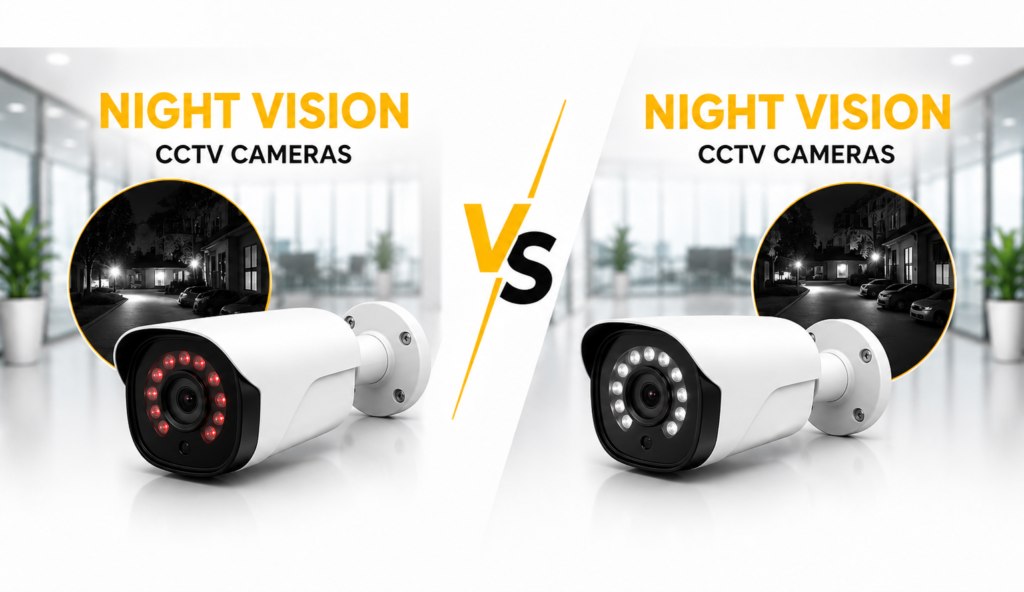
Night Vision CCTV Cameras: Everything You Need to Know

Night Vision CCTV Cameras: Everything You Need to Know More than 70% of property crimes happen under the cover of darkness. That makes night vision the single most important feature of any security camera system. If your cameras cannot capture clear, identifiable footage in pitch-black conditions, your security shield is practically useless for half of every day. Here is a practical breakdown of how night vision works, the different technologies available, and how to choose the right setup for your needs. How CCTV Night Vision Works Modern security cameras use one of two primary methods to see in the dark: Infrared (IR) illumination or Color Night Vision (Low-Light Sensors). 1. Traditional Infrared (IR) Night Vision Most standard security cameras feature a ring of small LED bulbs surrounding the lens. When the sun goes down, a built-in light sensor triggers these LEDs to emit Infrared light. While infrared light is completely invisible to the human eye, the camera’s image sensor is highly sensitive to it. The camera floods the area with this invisible light, bouncing it off objects and back into the lens to create a highly detailed, black-and-white image. 2. Color Night Vision (Low-Light Technology) Rather than projecting invisible light, color night vision relies on incredibly advanced image sensors (like Hikvision’s ColorVu or Dahua’s Full-color) paired with wider apertures These sensors are mathematically optimized to collect and amplify even the tiniest amount of ambient light—from streetlights, stars, or a sliver of moonlight—to produce vibrant, full-color images in near-total darkness. If the environment is truly pitch-black (0.0 lux), these cameras will usually turn on a very dim, warm physical white light to illuminate the scene gently. Infrared vs. Color Night Vision: The Showdown To choose the right technology, you need to weigh the trade-offs of each system. Traditional Infrared (IR) Pros: Works in absolute, 100% pitch-black conditions with zero ambient light. It is highly discreet because the light is invisible (aside from a faint red glow on the camera faceplate). Cons: The footage is strictly black and white. If an intruder flees the scene, you won’t be able to tell the police the color of their jacket, hair, or getaway vehicle. Best For: Unlit alleys, indoor warehouses, bedrooms, or areas where you do not want visible light pollution disturbing neighbors. Color Night Vision Pros: Captures critical color details (clothing, car paint, license plate colors). The visible warm white light also acts as an active physical deterrent to intruders. Cons: Requires at least a tiny amount of ambient light to perform best. The visible white spotlight can make the camera highly obvious, which some users find visually unappealing on their homes. Best For: Front driveways, retail storefronts, backyards, and streets with some surrounding ambient light. 3 Key Specs to Check Before You Buy When shopping for a night vision camera, don’t just trust the marketing photos on the box. Look directly at the technical spec sheet for these three values: 1. The Lux Rating Lux is the unit used to measure light intensity. A lower lux rating means the camera can see in darker environments. 0.0 Lux: The camera can see in absolute, total darkness (usually utilizing built-in IR LEDs). 0.001 to 0.01 Lux: Exceptional low-light performance capable of rendering color night vision with minimal ambient light. 2. Infrared Range (Distance) Check the manufacturer’s rated IR distance. For residential setups, look for a range of at least 100 feet (30 meters). Keep in mind that real-world range is usually about 20% lower than the advertised lab-tested maximum. 3. Smart IR Technology Ensure the camera specifications list Smart IR. Older or cheaper night vision cameras will “white-out” an object or face if it gets too close to the lens because the IR LEDs are blasting at full power. Smart IR automatically dims the infrared LEDs as an object approaches, keeping facial features perfectly clear and recognizable. Troubleshooting Night Vision Issues The “Foggy Halo” Effect: If your night view looks like a giant, blurry white circle, your camera is suffering from IR bounce-back. This happens when the invisible IR light reflects off a nearby wall, gutter, or dusty dome cover directly back into the lens. Adjust the camera angle away from close obstacles to fix it. The Pink Image Bug: If your camera’s daytime feed suddenly looks bright pink or purple, the mechanical IR-Cut Filter inside the lens is stuck. Tapping the side of the camera housing gently can sometimes free the mechanical slider and restore normal colors.  

Blog

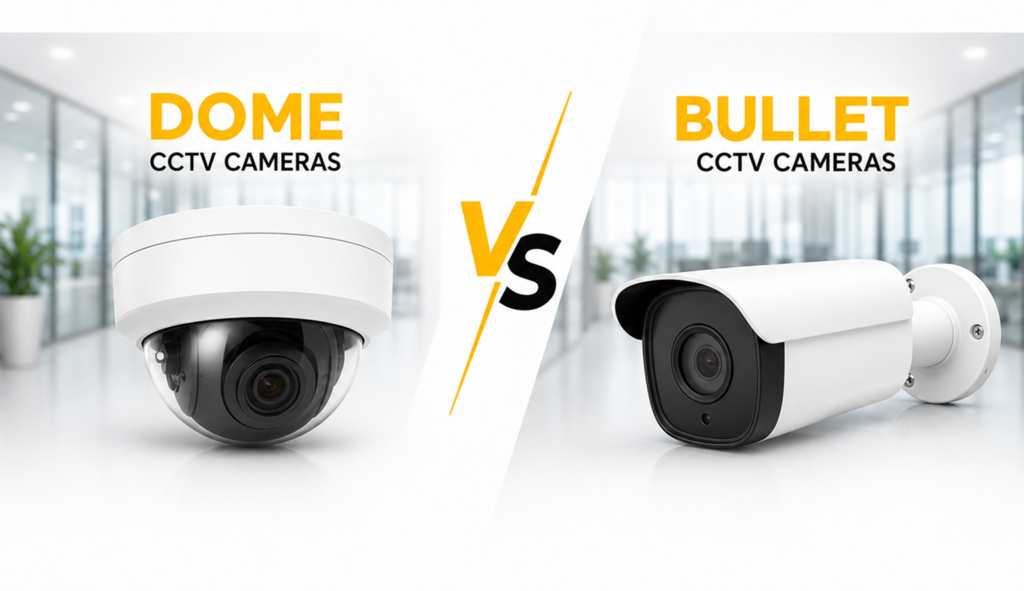
Dome vs Bullet CCTV Cameras: Which One Should You Buy?

Dome vs Bullet CCTV Cameras: Which One Should You Buy? When you are choosing security cameras, the decision between dome and bullet models is about much more than just aesthetics. It is a choice between two completely different security strategies: discretion versus deterrence. While they can contain the exact same image sensors, processors, and lens quality inside, their physical designs make them behave very differently out in the field.   Dome Camera: Low-Profile & Vandal-Resistant. Source: Shenzhen Shixin Digital Co., Ltd. / 1.3MP Waterproof High Speed Outdoor Dome HD CCTV Camera – IP … Bullet Camera: High-Visibility & Deterrence. Source: Swiftech / HIKVISION 5MP with in-Built Mic Bullet CCTV Camera | DS-2CE16H0T … Dome Cameras: Discreet and Vandal-Proof Dome cameras get their name from their circular, dome-shaped protective housing. They are designed to blend seamlessly into their surroundings. The Psychological Trick: Because of the smoked or reflective glass dome cover, it is incredibly difficult for someone standing below to see exactly where the camera lens is pointing. This creates a natural psychological barrier; people have to assume they are being watched from every angle. Vandal Resistance: This is where domes shine. Their low-profile, rounded design means there is nothing for a vandal to grab onto, hook a rope around, or easily knock out of alignment with a stick. Many carry an IK10 impact rating, meaning they can survive a direct hit from a baseball bat or brick. Best Suited For: Low ceilings, indoor retail spaces, office lobbies, front porches, and any low-mounting height areas vulnerable to physical tampering. Bullet Cameras: The Ultimate Visual Deterrent Bullet cameras feature a highly visible, cylindrical design that projects outward from the wall, looking like a miniature telescope pointing directly at a target. Active Deterrence: A bullet camera does not hide. Its physical presence screams “this property is protected.” If your goal is to stop a crime before it happens by making intruders think twice, the aggressive posture of a bullet camera is your best tool. Superior Range and Versatility: Because bullet housings are larger, they often accommodate larger telephoto lenses, stronger infrared LEDs for longer night vision (up to 150–300 feet), and easy physical adjustment knuckles that allow them to be aimed in almost any direction. Environmental Protection: Most bullet cameras feature a sliding “sun shield” lip over the top of the lens, which blocks lens flare from the sun and keeps rain droplets off the glass faceplate. Best Suited For: Long driveways, large parking lots, high outdoor building corners, perimeter fences, and areas where you want a highly visible security presence. Head-to-Head Comparison Feature Dome Cameras Bullet Cameras Aesthetic Impact Sleek, modern, unobtrusive Industrial, highly visible, aggressive Vandalism Risk Very low (Highly resistant to impact and grabbing) Moderate (Easier to knock down, cut, or redirect) Night Vision Range Typically shorter (50 to 100 feet) Typically longer (100 to 300+ feet) Installation & Aiming Slightly harder (Requires mounting, opening dome, and aiming) Very easy (Mount and adjust the external articulation joint) Rain/Glare Protection Susceptible to rain spots and dome reflections Sun shield blocks direct rain and lens flare Which One Should You Buy? To make the right choice, analyze where you are mounting the camera: Buy a Dome Camera if: You are mounting the camera within arm’s reach (under 10 feet), where someone could easily grab or hit it. You want the security system to be unobtrusive and match clean interior decor (e.g., inside a home, restaurant, or retail store). You want to keep people guessing about which specific zone the camera is monitoring. Buy a Bullet Camera if: You are mounting the camera high up on an exterior wall or pole (out of physical reach). Your main priority is scaring off trespassers or vandals before they step foot on your property. You need to monitor a long distance, like a long driveway, a fence line, or a wide-open backyard.

Blog

10 Signs Your CCTV System Needs Maintenance

10 Signs Your CCTV System Needs Maintenance 10 Signs Your CCTV System Needs Maintenance Introduction A closed-circuit television (CCTV) system is the silent backbone of physical security. Whether protecting a corporate campus, a retail storefront, or a residential driveway, surveillance cameras function as a continuous deterrent and a source of legal evidence. However, security systems are often treated with a “set-and-forget” mentality. Because CCTV equipment operates in background loops, critical failures are frequently left undiscovered until a security incident occurs—only for operators to find that the camera was offline, the footage was corrupted, or the hard drive failed months prior. Like any complex hardware network combining optics, digital processing, physical cabling, and high-capacity storage, CCTV systems degrade over time. Exposure to harsh outdoor environments, electrical fluctuations, thermal stress, and standard wear-and-tear will take a toll. Below is an in-depth breakdown of the 10 critical warning signs indicating your CCTV system is actively failing and requires immediate professional maintenance. 1. Persistent Video Artifacts (Lines, Flickering, or Rolling Static) One of the most obvious signs of hardware or transmission line degradation is the appearance of visual distortion on your monitors. This typically manifests as horizontal or vertical lines traveling across the screen, constant screen flickering, or rolling static bands (often called “hum bars”) These issues point to electrical and physical signaling vulnerabilities: Ground Loop Impedance: Ground loops occur when different pieces of video equipment are connected to ground points with slightly different electrical potentials. This causes an unwanted current to flow along the shielding of your video cables, introducing rolling hum bars. Electromagnetic Interference (EMI): If video cables are run too close to high-voltage power lines, fluorescent lighting ballasts, or heavy electrical machinery, the electromagnetic fields will bleed into your video signal, causing continuous flickering. Cable Shielding Breakdown: Over years of thermal expansion and contraction, the physical insulation on your coaxial or Ethernet cabling can crack, exposing the inner copper conductor to moisture and air, which degrades the high-frequency signal. 2. Blurry, Cloudy, or Out-of-Focus Live Feeds If your high-definition cameras look like they are streaming standard-definition video from decades ago, your system is crying out for physical maintenance. Image degradation is rarely a sudden digital failure; it is usually a gradual accumulation of environmental elements on the camera’s optical assembly. Several environmental factors can compromise your camera’s focus: Environmental Grime and Pollen: Wind-blown dust, exhaust soot, industrial pollution, and sticky tree pollen slowly bake onto the camera’s glass faceplate or protective dome cover. This creates a semi-opaque layer that diffuses light and reduces contrast. Spider Webs and Insect Activity: Spiders are naturally attracted to the warm chassis of security cameras and the infrared light they emit at night. Cobwebs stretched across the lens act as a physical block, catching dust and reflecting light back into the sensor. Internal Condensation: If the camera’s weatherproof rubber gaskets have dry-rotted or cracked, moisture will find its way inside the enclosure. When temperature changes occur, this trapped moisture condenses on the inside of the glass cover, creating a fogged lens that cannot be cleaned from the outside. 3. Infrequent, Missing, or Gapped Video Archives The primary purpose of a security system is to provide historical proof when something goes wrong. If you log into your system to pull footage and discover that entire hours, days, or weeks of video are missing, your recording subsystem is in a critical state of failure. This behavior points directly to underlying storage hardware or operating system issues: Disk Sector Degradation: CCTV storage units (NVRs or DVRs) write data 24/7/365. Standard computer hard drives are not built for this workload and will burn out quickly. Even specialized, high-endurance surveillance drives (like WD Purple or Seagate SkyHawk) eventually develop bad sectors. When the NVR attempts to write to these damaged areas, the system hangs, skips files, or drops the stream entirely. Overheating and CPU Throttling: If your recording hub is stuffed into a poorly ventilated server closet, cabinet, or attic, it will run incredibly hot. To prevent catastrophic meltdowns, the processor will automatically slow down, prioritizing the display of live feeds while quietly dropping the background recording processes. Firmware Database Corruption: Continuous power flickers or sudden blackouts can corrupt the NVR’s file allocation database. The drive may have physical space, but the indexing system can no longer reference where files begin or end, leading to massive, unrecoverable recording gaps. 4. Recurrent Storage Drive Errors and NVR Beeping Modern recording hubs are designed to alert administrators when a catastrophic system fault is imminent. The most common expression of this is a loud, rhythmic, or persistent beeping sound coming directly from the NVR chassis, accompanied by warning icons on your main monitor display. These warnings are urgent and indicate: S.M.A.R.T. Diagnostic Failure: Self-Monitoring, Analysis, and Reporting Technology (S.M.A.R.T.) is built into your hard drives to monitor parameters like spin-up time, read/write error rates, and drive temperature. When these parameters cross safe thresholds, the drive reports an imminent failure to the NVR, triggering the system alarm. Power Supply Unit (PSU) Degradation: Over time, the capacitors inside your NVR’s power brick degrade. They may supply enough current to spin the mainboard but fail to provide the consistent, clean power needed to spin up multiple mechanical hard drives simultaneously, causing the drives to repeatedly drop offline and trigger alarms. Unformatted Storage Alerts: If the NVR suddenly prompts you with a message stating “HDD not formatted” or “No HDD Detected,” the logical file structure has collapsed or the drive controller has died completely. Your system is currently not recording anything. 5. Blind or White-Out Infrared Night Vision A camera that produces a pristine image at 2:00 PM but turns into a pitch-black sheet of static or a washed-out white screen at 2:00 AM has a night-vision failure. This is almost always caused by physical degradation of the infrared (IR) LED array or poor spatial alignment. Burnt-Out IR LED Diodes: Infrared LEDs, like any lightbulb, have a finite lifespan. In cheaper cameras, these diodes burn out one

Blog

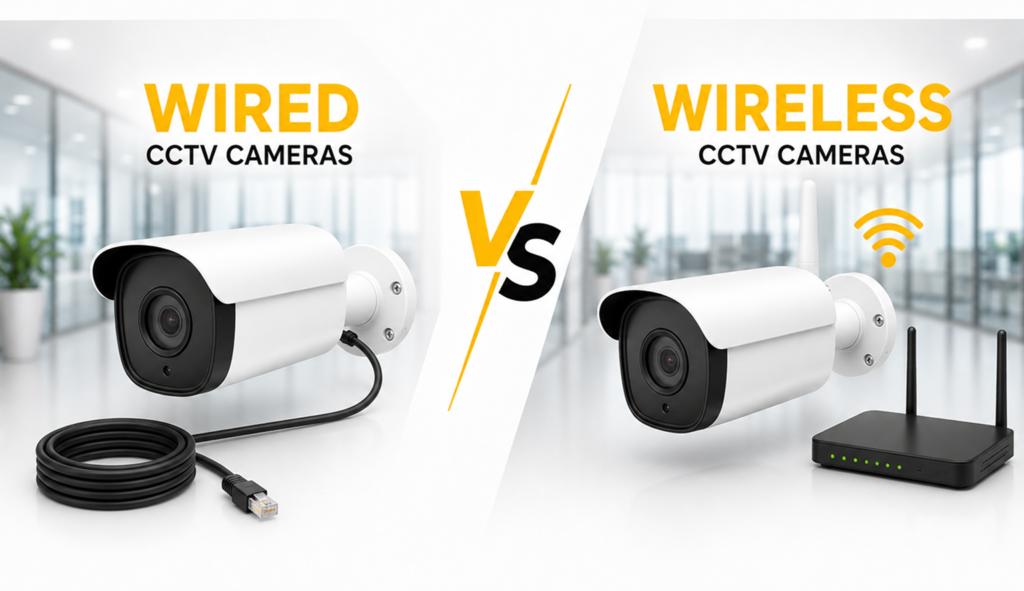
Wired vs Wireless CCTV Cameras: Which Is Better?

Wired vs Wireless CCTV Cameras: Which Is Better? Choosing between wired and wireless CCTV cameras isn’t about finding which one is universally “better”—it’s about matching the right system to your specific property, budget, and appetite for installation hassle. Both systems have distinct engineering philosophies, and the right choice for a rental apartment is vastly different from the right choice for a large, multi-story property. The Core Difference at a Glance Feature Wired CCTV (PoE / Coaxial) Wireless CCTV (Wi-Fi / Battery) Data Transmission Physical cables (Ethernet or Coax) Wi-Fi frequencies (2.4 GHz / 5 GHz) Power Source Constant (Power over Ethernet or DC adapter) Plug-in outlet, rechargeable battery, or solar Installation Labor-intensive (Drilling, conduit, cable routing) DIY-friendly (Mount and pair in minutes) Signal Reliability 100% stable; completely immune to RF interference Subject to Wi-Fi drops, range limits, and congestion Continuous Recording Perfect for 24/7 continuous local recording Typically limited to motion-triggered clips to save battery/bandwidth Storage Style Local NVR/DVR (No monthly fees, Terabytes of storage) MicroSD card or Cloud Subscriptions (Monthly fees) Security/Hacking Extremely secure; physical access required to tamper Vulnerable to Wi-Fi jamming and remote hacking if poorly secured Deep Dive: Wired CCTV Systems Modern wired systems typically use PoE (Power over Ethernet). A single network cable runs from a central Network Video Recorder (NVR) to each camera, supplying both power and high-speed data. The Pros Unmatched Reliability: No lag, no buffering, and no dropped connections. Because the data travels through physical copper, it is completely unaffected by thick concrete walls or dense radio frequency (RF) traffic. Constant 24/7 Monitoring: There are no batteries to charge, and you aren’t trying to conserve network bandwidth. You can record non-stop high-bitrate 4K video to massive hard drives. Immunity to Jamming: Cheap, illegal Wi-Fi jammers can easily blind wireless cameras. Wired cameras are completely immune to this vulnerability. Zero Ongoing Fees: All of your video files are stored locally on your NVR. You don’t need a monthly subscription to review your historical archives. The Cons Painful Setup: Unless your building is already pre-wired with Cat6 ethernet, installing wired cameras involves drilling holes through walls, crawling through attics/crawlspaces, and routing cables cleanly. Most people need to hire a professional. Zero Flexibility: Once a wired camera is mounted and the cable is run, moving it even a few feet can mean hours of tedious re-wiring. Deep Dive: Wireless CCTV Systems Wireless systems transmit video over your local Wi-Fi network. They are divided into two categories: Plug-in Wireless (requires a nearby power outlet) and Wire-Free (100% cable-free, running on rechargeable batteries or solar panels). The Pros Ultimate Convenience & Portability: You can install a wireless camera in under 15 minutes. Since you don’t have to drill heavy holes or run permanent lines, they are highly portable and perfect for renters. Highly Scalable: Want to add another camera to your system? Just buy one, mount it within range of your router, sync it to your app, and you’re good to go. Built-in Smart Integrations: Almost all consumer wireless cameras are built to integrate natively with smart home ecosystems like Google Home, Alexa, and dedicated smartphone apps for immediate remote notifications. The Cons Bandwidth & Signal Bottlenecks: Every wireless camera on your network continuously uploads data. If you have 4 or 5 high-definition wireless cameras continuously streaming, they can severely congest your home Wi-Fi, slowing down your video calls, gaming, and streaming. Battery Maintenance: If you choose a wire-free (battery) model, you have to physically pull the cameras down every 2 to 6 months to recharge them—which gets highly tedious if they are mounted high out of reach. The “Cloud Subscription” Trap: While initial hardware costs are cheap, many wireless brands lock advanced AI detection (human vs. pet classification) and historical video playback behind expensive monthly cloud subscriptions. Which One is Right for You? Choose a Wired System if: You are a homeowner or business owner looking for a permanent, long-term security solution (10+ year lifespan). You require reliable 24/7 continuous recording instead of just short, motion-triggered clips. You are installing a larger system consisting of 4 or more cameras (which would choke a standard Wi-Fi router). You want maximum protection against hacking and wireless jamming. Choose a Wireless System if: You live in a rental property, apartment, or temporary space where drilling structural holes is prohibited. You want a straightforward, cost-effective DIY setup without paying for professional installation labor. You only need 1 to 3 cameras to cover basic entry points. You prioritize convenience, mobile app alerts, and easy integration with your existing smart home system.      

Blog

Wireless CCTV Camera Installation

Wireless CCTV Camera Installation Step-by-Step Guide: Wireless CCTV Camera Installation Introduction Deploying a Wireless (Wi-Fi) CCTV camera system is an excellent option for spaces where running long, structural network cables is physically impractical, visually unappealing, or cost-prohibitive. Unlike wired IP systems that rely on physical Ethernet cabling for data transmission, wireless cameras utilize local Wi-Fi frequencies (typically 2.4 GHz or 5 GHz bands) to beam high-definition video directly to an on-premises Network Video Recorder (NVR), a local computer, or secure cloud servers. However, a common misconception is that “wireless” means completely wire-free. While the data travels through the air, most high-performance commercial and residential wireless cameras still require a reliable physical link to a nearby power source. Installing a stable, resilient wireless surveillance loop requires a strategic balance between physical placement and robust network calibration. 1. Site Auditing and Wi-Fi Signal Strength Mapping H4: The Critical “Signal-to-Noise” Pre-Check The single most frequent cause of wireless camera failure is a weak or unstable network connection. Before drilling holes or mounting hardware, you must perform a physical Wi-Fi site audit at the exact location where the camera will live. Hold a smartphone or network analyzer tool at the target mounting spot, connect to your office Wi-Fi, and run a continuous ping test or speed test. Your signal strength should ideally register at -60 dBm or better to guarantee seamless, lag-free streaming of high-resolution video without dropping frames. H5: Navigating Signal Obstructions and Interference Wi-Fi signals operate on line-of-sight principles, and their strength degrades rapidly as they pass through dense physical objects. Standard drywall and wood cause minimal attenuation, but thick concrete walls, brickwork, tinted glass, and heavy steel framing can instantly kill your wireless range. Furthermore, standard 2.4 GHz frequencies are highly susceptible to signal congestion from nearby office routers, microwaves, and Bluetooth devices. If your target installation spot suffers from heavy attenuation, plan to install a dedicated Wi-Fi range extender or a point-to-point wireless access point nearby to bridge the gap. 2. Hardware and Connectivity Equipment Checklist H4: Cameras and Recording Infrastructure Gather all essential physical components before beginning your deployment: Wireless IP Cameras: Chosen based on deployment needs (outdoor bullet vs. indoor dome) and resolution specifications. Storage Hub: A wireless-enabled NVR with an internal surveillance-rated hard drive, or a high-capacity MicroSD card for local edge storage. Power Adapters & Extension Cables: Low-voltage DC power cables and weatherproof power adapters suited to the camera’s location. H5: Network Infrastructure Upgrades Depending on the size of your installation, standard residential or basic office ISP routers can easily bottleneck when trying to ingest multiple high-bandwidth digital video streams simultaneously. For setups with more than three wireless cameras, integrate a dedicated standalone wireless access point (WAP) or a robust Mesh Wi-Fi network. A mesh network uses multiple interconnected nodes to blanket the property in a single, high-bandwidth wireless fabric, allowing outdoor cameras to connect to the closest node with minimal signal loss. 3. Bench Configuration and Pre-Pairing Workflow H4: Initializing the System Locally Never mount a wireless camera onto a wall before pairing it to your network. Do all of your initial provisioning on a test bench right next to your NVR and router. Plug the wireless camera into its local power adapter. Download the manufacturer’s configuration app on your smartphone or access the camera’s default internal management page via a web browser using a laptop. H5: Syncing to the Wireless SSID Follow the configuration wizard to link the camera to your dedicated network loop. Select your office or home Wi-Fi SSID from the detected list and input the secure network security key. Security Note: It is highly recommended to connect surveillance equipment to an isolated Guest Network or dedicated Security VLAN. This keeps your primary business or personal data network secure and prevents standard office traffic from eating into your camera’s streaming bandwidth. Once the camera status displays as “Online,” test the live video feed on your phone, then unplug the unit to prepare for physical mounting. 4. Mounting and Structural Installation H4: Securing the Chassis Bracket Take the camera bracket to the audited installation spot. Use the included template to mark your screw alignments. If mounting onto wood or siding, screw the bracket directly into place. For masonry, concrete, or stucco, drill pilot holes using a hammer drill, insert the correct plastic wall anchors, and secure the bracket firmly using rust-resistant screws. Attach the camera housing to the mount, but leave the adjustment collars slightly loose so you can fine-tune the view angle later. H5: Running Low-Voltage Power Lines Because wireless cameras require constant power to run their processors and infrared night-vision arrays, you must route a low-voltage power wire to the nearest electrical outlet. If an outlet is inside the building, drill a clean hole through the wall, pass the thin DC barrel connector through, and plug it in indoors. If you must connect to an outdoor outlet, the power brick must be locked inside an IP66-rated weatherproof electrical enclosure box to prevent rain, moisture, and dust from causing short circuits or electrical fires. 5. Aligning Fields of View and Optimizing Night Vision H4: Framing the Target Zone With the camera physically mounted and powered on, pull up the live video feed on your smartphone app. Stand at the monitor or have an assistant look at the screen while you adjust the camera’s physical orientation. Eliminate unnecessary dead zones—such as large expanses of empty sky or blank walls—and focus the lens squarely on entry thresholds, high-traffic walking lanes, or parking spaces. Tighten the camera’s mounting collars firmly once the frame is perfectly locked in. H5: Eliminating IR Bounce-Back If your camera features built-in Infrared (IR) LEDs for night vision, check the feed after dark to ensure clear imagery. A common rookie mistake is mounting a wireless camera too close to an adjacent wall or ceiling overhang. When the IR lights kick in at night, the invisible light will bounce off the nearby white wall directly back into the camera lens. This

Blog

CCTV AMC (Annual Maintenance Contract)

CCTV AMC (Annual Maintenance Contract) Maximizing System Uptime: The Complete Guide to CCTV Annual Maintenance Contracts (AMC) Introduction Installing a high-definition CCTV surveillance network is a major step toward securing your facility. However, a security system is only effective if it functions flawlessly when an incident occurs. Cameras exposed to the elements gather dust, electrical fluctuations stress power supplies, and hard drives spinning 24/7 eventually face wear and tear. Without regular upkeep, systems inevitably experience “blind spots” or recording failures—often discovered only after a security breach has occurred. An Annual Maintenance Contract (AMC) is a service agreement between a business and a professional security systems integrator to provide scheduled preventive care, regular health audits, and rapid emergency troubleshooting for your surveillance infrastructure. For commercial enterprises, multi-site offices, and residential complexes, a structured CCTV AMC transitions your security strategy from reactive firefighting to proactive management, ensuring maximum system uptime. 1. Scope of Service: Comprehensive vs. Non-Comprehensive AMCs H4: Comprehensive Maintenance Contracts When signing a CCTV AMC, organizations must choose between two distinct financial and service models. A Comprehensive AMC acts as an all-inclusive insurance policy for your surveillance network. Under this contract, the service provider charges a fixed annual fee that covers all preventive maintenance labor, emergency call-outs, and the complete cost of replacing faulty hardware components—such as burnt power supplies, failed hard drives, or malfunctioning camera lenses. This model provides complete budget predictability, protecting organizations from unexpected capital expenditures if expensive hardware fails. H5: Non-Comprehensive Maintenance Contracts A Non-Comprehensive AMC operates purely as a labor and service agreement. The annual contract fee covers routine quarterly inspections, system cleaning, and priority technical support troubleshooting. However, if a camera sensor burns out or an NVR motherboard fails, the cost of the replacement hardware parts is billed separately to the client. This model carries a lower initial annual fee and is often favored by budget-conscious businesses with relatively new systems that are still covered under original manufacturer warranties. 2. The Architecture of a Preventive Maintenance Checklist H4: Physical Hardware Diagnostics and Cleaning Preventive maintenance is the core component of any AMC, typically executed on a quarterly schedule. Technicians follow a rigorous, structural checklist to keep hardware running at peak performance: Camera Lens Care: Cleaning outer dome casings and lenses with specialized microfiber cloths and antistatic solutions to remove spider webs, dust, and water spots that degrade image quality. Housing and Mount Inspection: Checking that mounting brackets, outdoor junction boxes, and conduits are structurally sound, tightly sealed against moisture, and free from physical corrosion. Cable and Connector Audits: Inspecting exposed Ethernet or coaxial cable joints, checking for cable sagging, and ensuring RJ45 or BNC connectors are securely seated and free from oxidation. H5: Digital, Storage, and Backend Maintenance Beyond physical components, technicians dive into the digital configuration of your Network Video Recorders (NVRs) or Digital Video Recorders (DVRs): Storage Health Analysis: Running S.M.A.R.T. diagnostic checks on surveillance hard drives to catch early signs of disk sector failure before video data loss occurs. Firmware and Security Updates: Flashing recorders and IP cameras with the latest manufacturer firmware patches to close cybersecurity vulnerabilities and improve system stability. Time and Sync Audits: Verifying that all devices are properly synced to a reliable Network Time Protocol (NTP) server. Inaccurate timestamps can completely invalidate video footage as legal evidence in a court of law. 3. Key Performance Indicators (KPIs) and SLA Commitments H4: Defining Service Level Agreements (SLAs) A professional CCTV AMC is bound by a legally enforceable Service Level Agreement (SLA). The SLA explicitly defines the standard of service the vendor must provide, ensuring accountability. It dictates how quickly a technician must respond based on the severity of the system failure. For instance, a single camera failure in a non-critical hallway might carry a 24-hour response window, whereas a complete NVR crash that blinds the entire facility would trigger a critical, high-priority emergency response window. H5: Turnaround Time (TAT) and Loaner Unit Logistics A critical metric in any SLA is Turnaround Time (TAT)—the duration between the initial fault report and the absolute resolution of the issue. If a faulty camera must be unmounted and sent to the manufacturer’s service center for repair, a strong AMC contract mandates that the vendor must temporarily install a free loaner camera in its place. This ensures that the facility’s security perimeter maintains zero blind spots while permanent repairs are being processed. 4. Financial Structure and Standard Pricing Models H4: Per-Camera Pricing Architecture For standard commercial offices, retail outlets, and small-to-medium enterprises, AMC pricing is typically calculated using a transparent per-camera model. The vendor evaluates the total node count of the system and charges a flat rate per camera line, which includes the backend recorder channel support. This rate varies depending on the technology used; digital IP cameras with advanced AI analytics carry a slightly higher maintenance premium than simple legacy analog cameras. H5: Percentage of Capital Expenditure (CapEx) Model For enterprise-grade installations—such as massive data centers, multi-floor corporate campuses, or public infrastructure—pricing is often structured as a fixed percentage of the total system installation cost. Typically, an annual AMC fee ranges between 10% to 15% of the initial hardware and infrastructure investment, depending on the age of the system, the complexity of the fiber-optic network backbone, and the intensity of the required SLA response windows. 5. Administrative Transparency: Checklists and Reporting H4: Digital Maintenance Logs and Sign-Off Sheets Transparency is essential for verifying that preventive care is actually being performed. After every scheduled AMC visit, technicians must fill out a detailed, itemized service report. Modern integrators use digital field-service applications that log the exact timestamp of the visit, track the specific voltage readings of the power supplies, and require a digital sign-off from the client’s facility manager. These records create a reliable operational history for the building. H5: Incident Reports and System Auditing When an unexpected hardware failure or security incident occurs, the AMC vendor provides an official incident report. This report documents the root cause of the failure (e.g., an

Blog

IP CCTV Camera Installation

IP CCTV Camera Installation Upgrading your security infrastructure with an Internet Protocol (IP) CCTV system is one of the most effective ways to protect your office or home. Unlike legacy analog systems that require separate coaxial and power lines, modern IP systems simplify installation using Power over Ethernet (PoE). A single Ethernet cable (Cat5e or Cat6) carries both high-speed digital video and electrical power directly from your network network switch or Network Video Recorder (NVR) to the camera. Whether you are a hands-on IT professional configuring a corporate network or setting up a local office security loop, installing an IP camera system requires careful planning, robust wiring, and precise network configuration. This guide outlines the end-to-end installation process, from physical mounting to digital setup. 1. Pre-Installation Planning and Camera Placement H4: Determining Camera Angle and Field of View Before drilling any holes, map out your camera locations on a floor plan. Standard dome cameras are ideal for indoor ceilings and wide-angle room views, while bullet cameras are designed for highly visible, directional outdoor perimeters. Ensure your cameras are placed high enough (typically 8 to 10 feet) to prevent tampering or physical vandalism, but low enough to capture clear facial features. Focus on primary entryways, corridors, parking lot exits, and valuable assets like server closets or safes. H5: Lighting Considerations and Glare Mitigation Be highly mindful of light sources. Avoid pointing your cameras directly at large windows, streetlights, or highly reflective surfaces. Direct sunlight or oncoming headlights can cause severe glare and trigger the camera’s wide dynamic range (WDR) settings, potentially turning your target subject into a dark silhouette. For outdoor perimeters, ensure the camera’s infrared (IR) night-vision LEDs will not reflect directly off nearby walls or tree leaves, which can blind the sensor in total darkness. 2. Essential Tools and Hardware Checklist H4: Cabling and Structural Hardware Ensure you have all physical components prepared before starting the installation: IP Cameras: Selected based on resolution (4MP or 4K), lens focal length, and form factor. Network Video Recorder (NVR): With a pre-installed surveillance-rated hard drive (HDD). Cat5e or Cat6 Ethernet Cables: Solid copper conductor cables are highly recommended for PoE stability over long distances. RJ45 Connectors & Crimping Tool: For terminating custom-length cable runs. Outdoor Junction Boxes: To protect cable joints and pigtails from moisture and weather. H5: Power and Networking Equipment Because IP systems are network-centric, you must choose your power delivery method. If you are using a PoE NVR, the cameras can plug directly into the ports on the back of the recorder. If you have an standard NVR, you will need a PoE Network Switch or individual PoE Injectors to sit between your main router and the camera, injecting electrical power directly into the Ethernet line. 3. Running and Terminating the Cable Network H4: Pulling Cable Through Walls and Ceilings Start by running your Cat5e or Cat6 cables from your centralized NVR/Switch location to each designated camera endpoint. Keep network runs under 100 meters (328 feet), as copper cabling experiences data packet loss and voltage drop beyond this distance. If running cables through walls or drop ceilings, avoid running them parallel to high-voltage AC electrical lines (such as 110V or 220V power lines), as electromagnetic interference can disrupt your camera feeds. Keep a minimum of 12 inches of separation from power cables wherever possible. H5: Crimping RJ45 Connectors (T568B Standard) Once the cables are in place, strip back the outer jacket about an inch and untwist the internal wire pairs. Arrange the wires according to the industry-standard T568B color code: White-Orange, 2. Orange, 3. White-Green, 4. Blue, 5. White-Blue, 6. Green, 7. White-Brown, 8. Brown. Insert the ordered wires into an RJ45 connector, ensuring they reach all the way to the tip, and crimp them firmly with your crimping tool. Test both ends of the cable with a basic RJ45 network tester before mounting the camera to ensure there are no open splits or shorts. 4. Mounting and Physical Camera Installation H4: Securing the Mounting Bracket Place the camera’s mounting template or bracket against the wall or ceiling. Mark the screw holes with a pencil. If mounting on drywall, drill pilot holes and insert plastic anchors to support the weight of the camera. If mounting on concrete or brick, use a masonry bit and wall plugs. Feed the terminated RJ45 cable through the center of the bracket or through a side-access conduit cutout. H5: Weatherproofing Outdoor Connections For outdoor camera installations, water ingress is the number one cause of hardware failure. Always install an outdoor junction box to house the delicate camera pigtail connector. Wrap the RJ45 connection with self-amalgamating waterproof tape, or slide the waterproof gland (included with most IP cameras) over the Ethernet jack before clicking it in place. Create a drip loop (a downward curve in the cable just before it enters the camera or junction box) to ensure rainwater flows down off the loop instead of following the wire directly into the device. 5. Connecting to a PoE Injector or Switch H4: Setting Up a PoE Injector for Single Cameras If you are integrating a standalone IP camera into an existing non-PoE office network, you can use a compact PoE Injector. To set this up, connect a standard Ethernet cable from your non-PoE network router to the port labeled “LAN” or “Data In” on the injector. Then, run a second Ethernet cable from the port marked “PoE” or “Power + Data Out” directly to the IP camera. Plug the injector’s power cord into a wall outlet to deliver power directly through the line. H5: Connecting to a Multi-Port PoE Switch For systems with four or more cameras, a dedicated PoE Network Switch is the most efficient choice. Run all of your camera lines directly into the PoE-enabled ports on the switch. Then, run a single “uplink” Ethernet cable from the switch to your main network router. This consolidates all of your camera bandwidth onto a single high-speed network line and allows you to manage

Scroll to Top